


 MENU
MENUQuestion:
How do I prevent the triangulation feature from spanning concave regions of my plot with triangles?
Solution:
Extracted polylines can be used as boundary zones to limit the triangulation. In particular, these polylines can be used to prevent triangles from spanning concave regions during 2D triangulations.
The following procedure utilizes these polylines to trim a triangulation of unorganized data to the desired shape:
1) Load the data to be converted to a finite element (FE) triangular zone. In this example, we are using the unorganized data in Figure 1.
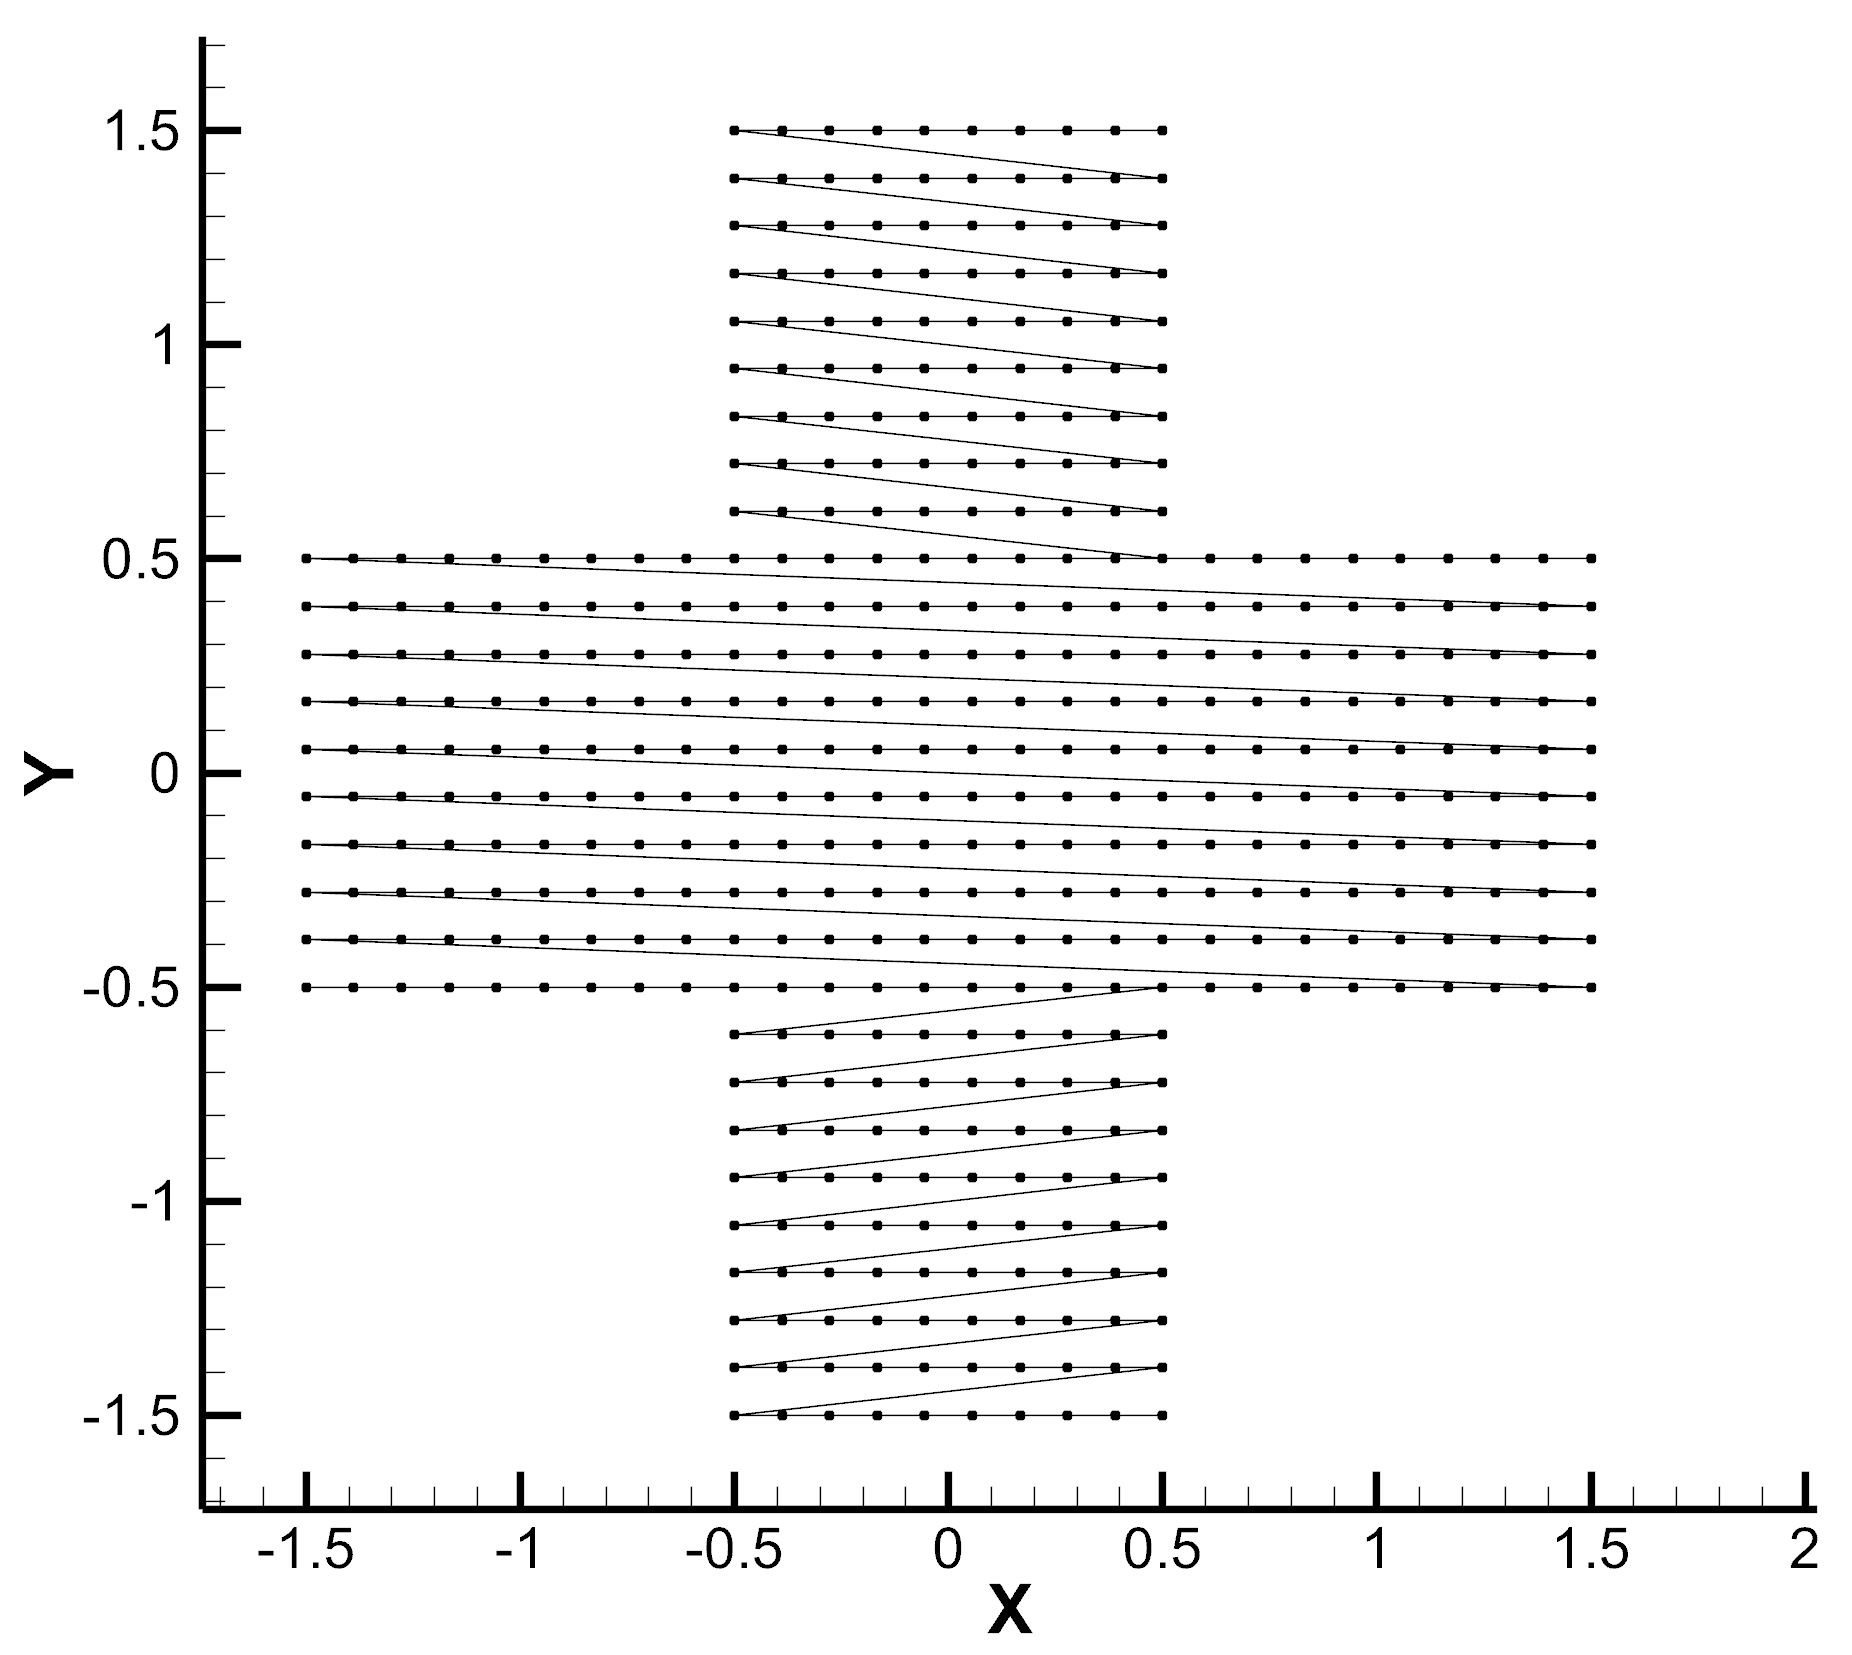
Figure 1
2) Triangulate the data by clicking Data > 2D Triangulation… This brings up the 2D Triangulation dialog seen in Figure 2. Select the source zones you want to convert to FE triangular zones, and click Triangulate.
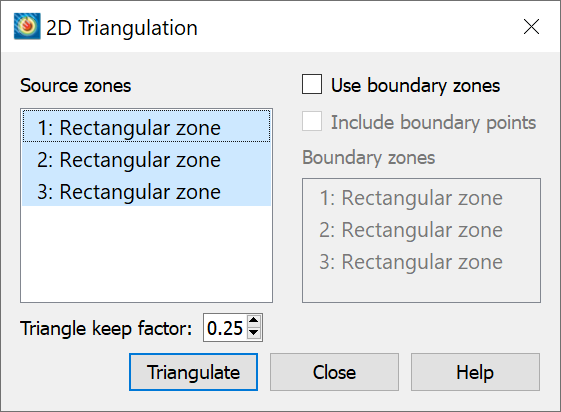
Figure 2
3) On top of this triangulated data, as seen in Figure 3, draw straight polylines that cross over the triangles to be trimmed from the triangulation. Start the polyline head in the first triangle you want to trim, and end it within the last triangle you want to delete.

Figure 3
4) Draw as many separate lines as needed until every triangle to trim has been crossed by a polyline as seen in Figure 4.
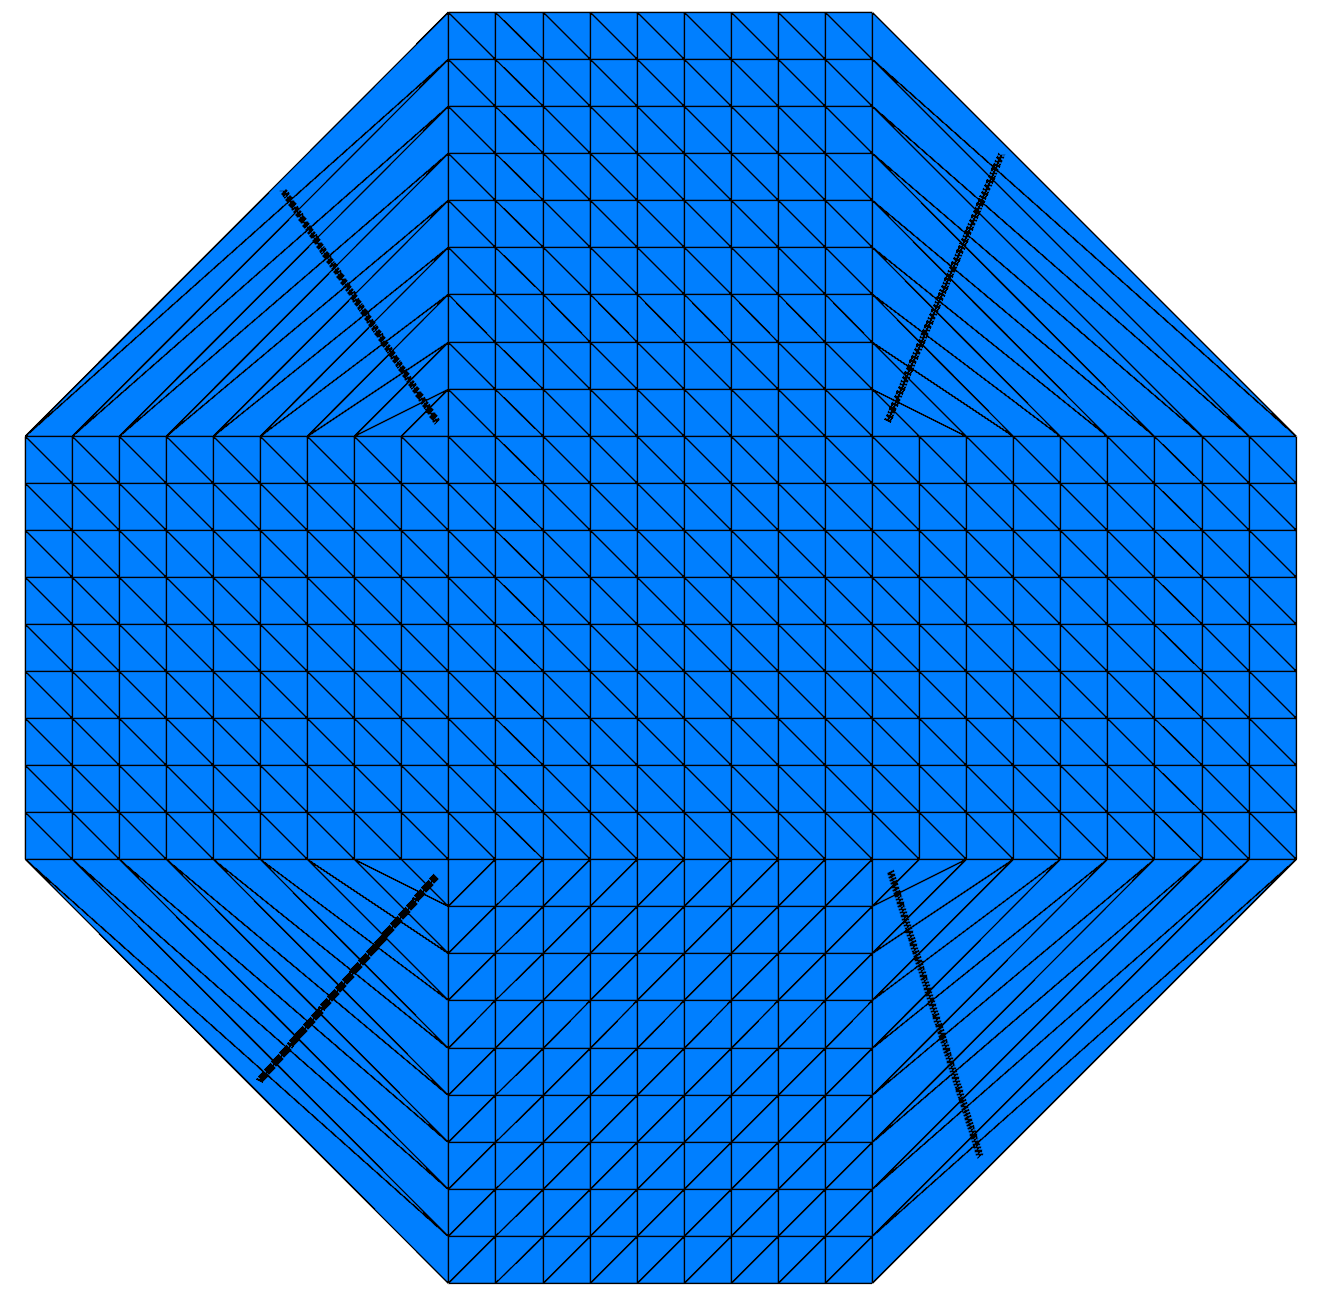
Figure 4
5) Right-click on a polyline and select the “Extract points…” option. See Figure 5. The Extract Data Points dialog should appear (Figure 6), and the defaults should be sufficient. Click Extract. Repeat this data extraction for every polyline.
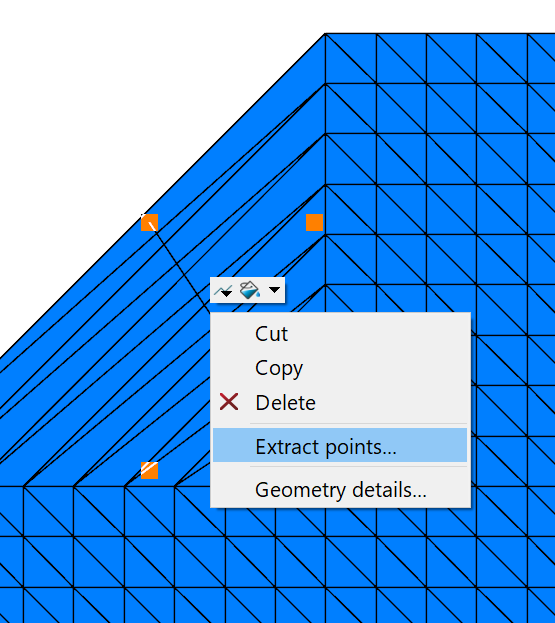
Figure 5
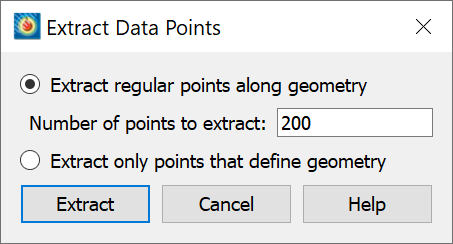
Figure 6
6) Similar to step 2, create the final triangulation: Once the polylines are extracted, go to Data > 2D Triangulation, and the 2D Triangulation dialog should appear as seen in Figure 7. Now, in the left column, select the old Triangulation zone as the Source zone. Next, toggle on ‘Use boundary zones.’ Finally, select the Extracted Points created from the polylines as the Boundary zones. Click Triangulate.
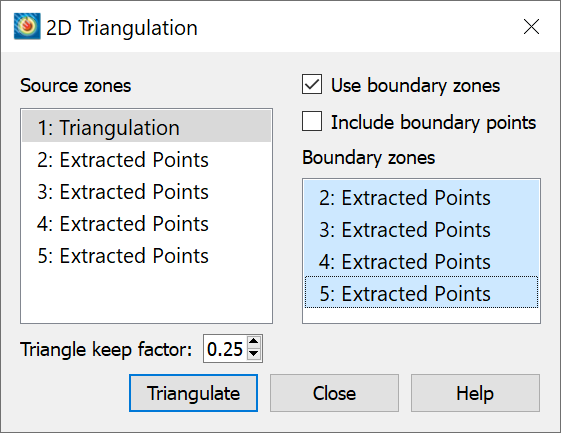
Figure 7
7) As demonstrated in Figure 8, click Zone Style… in the side panel, navigate to the Mesh tab. Right-click in the “Show Zone” column for the newest Triangulation zone, and select ‘Show selected only’.
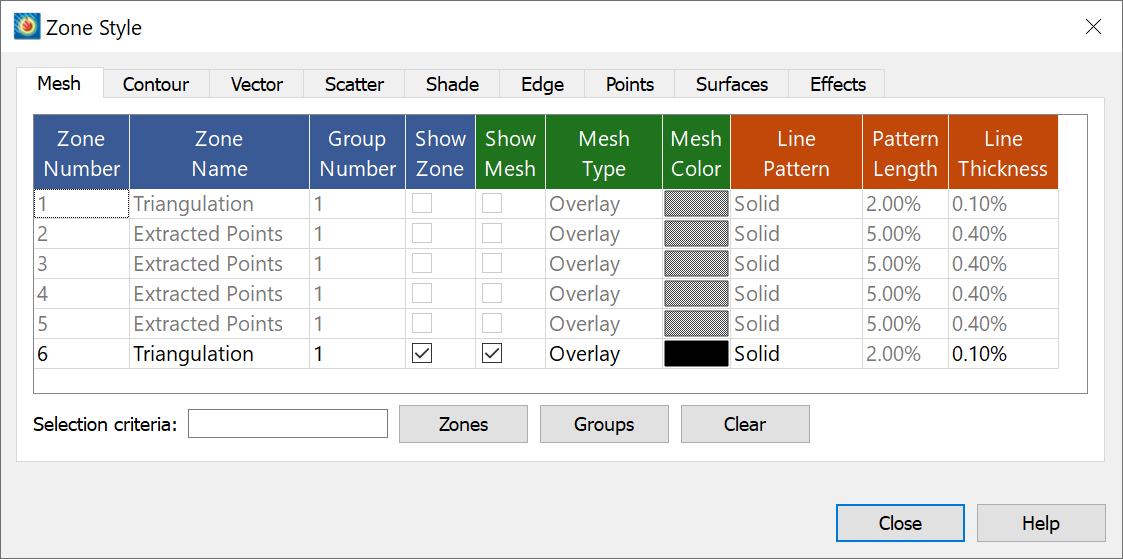
Figure 8
8) The plot should show a trimmed Triangulation zone, but the polyline geometries (not the extracted zones) are still drawn on the plot. Right-click on a polyline, and select delete from the generated menu. Continue until all polylines are deleted.
9) Finally, set the Zone Style as you want for the newly trimmed Triangulation zone. In the side panel for the plot in Figure 9, Mesh and Shade are activated. Shade is set to a flavor of blue.
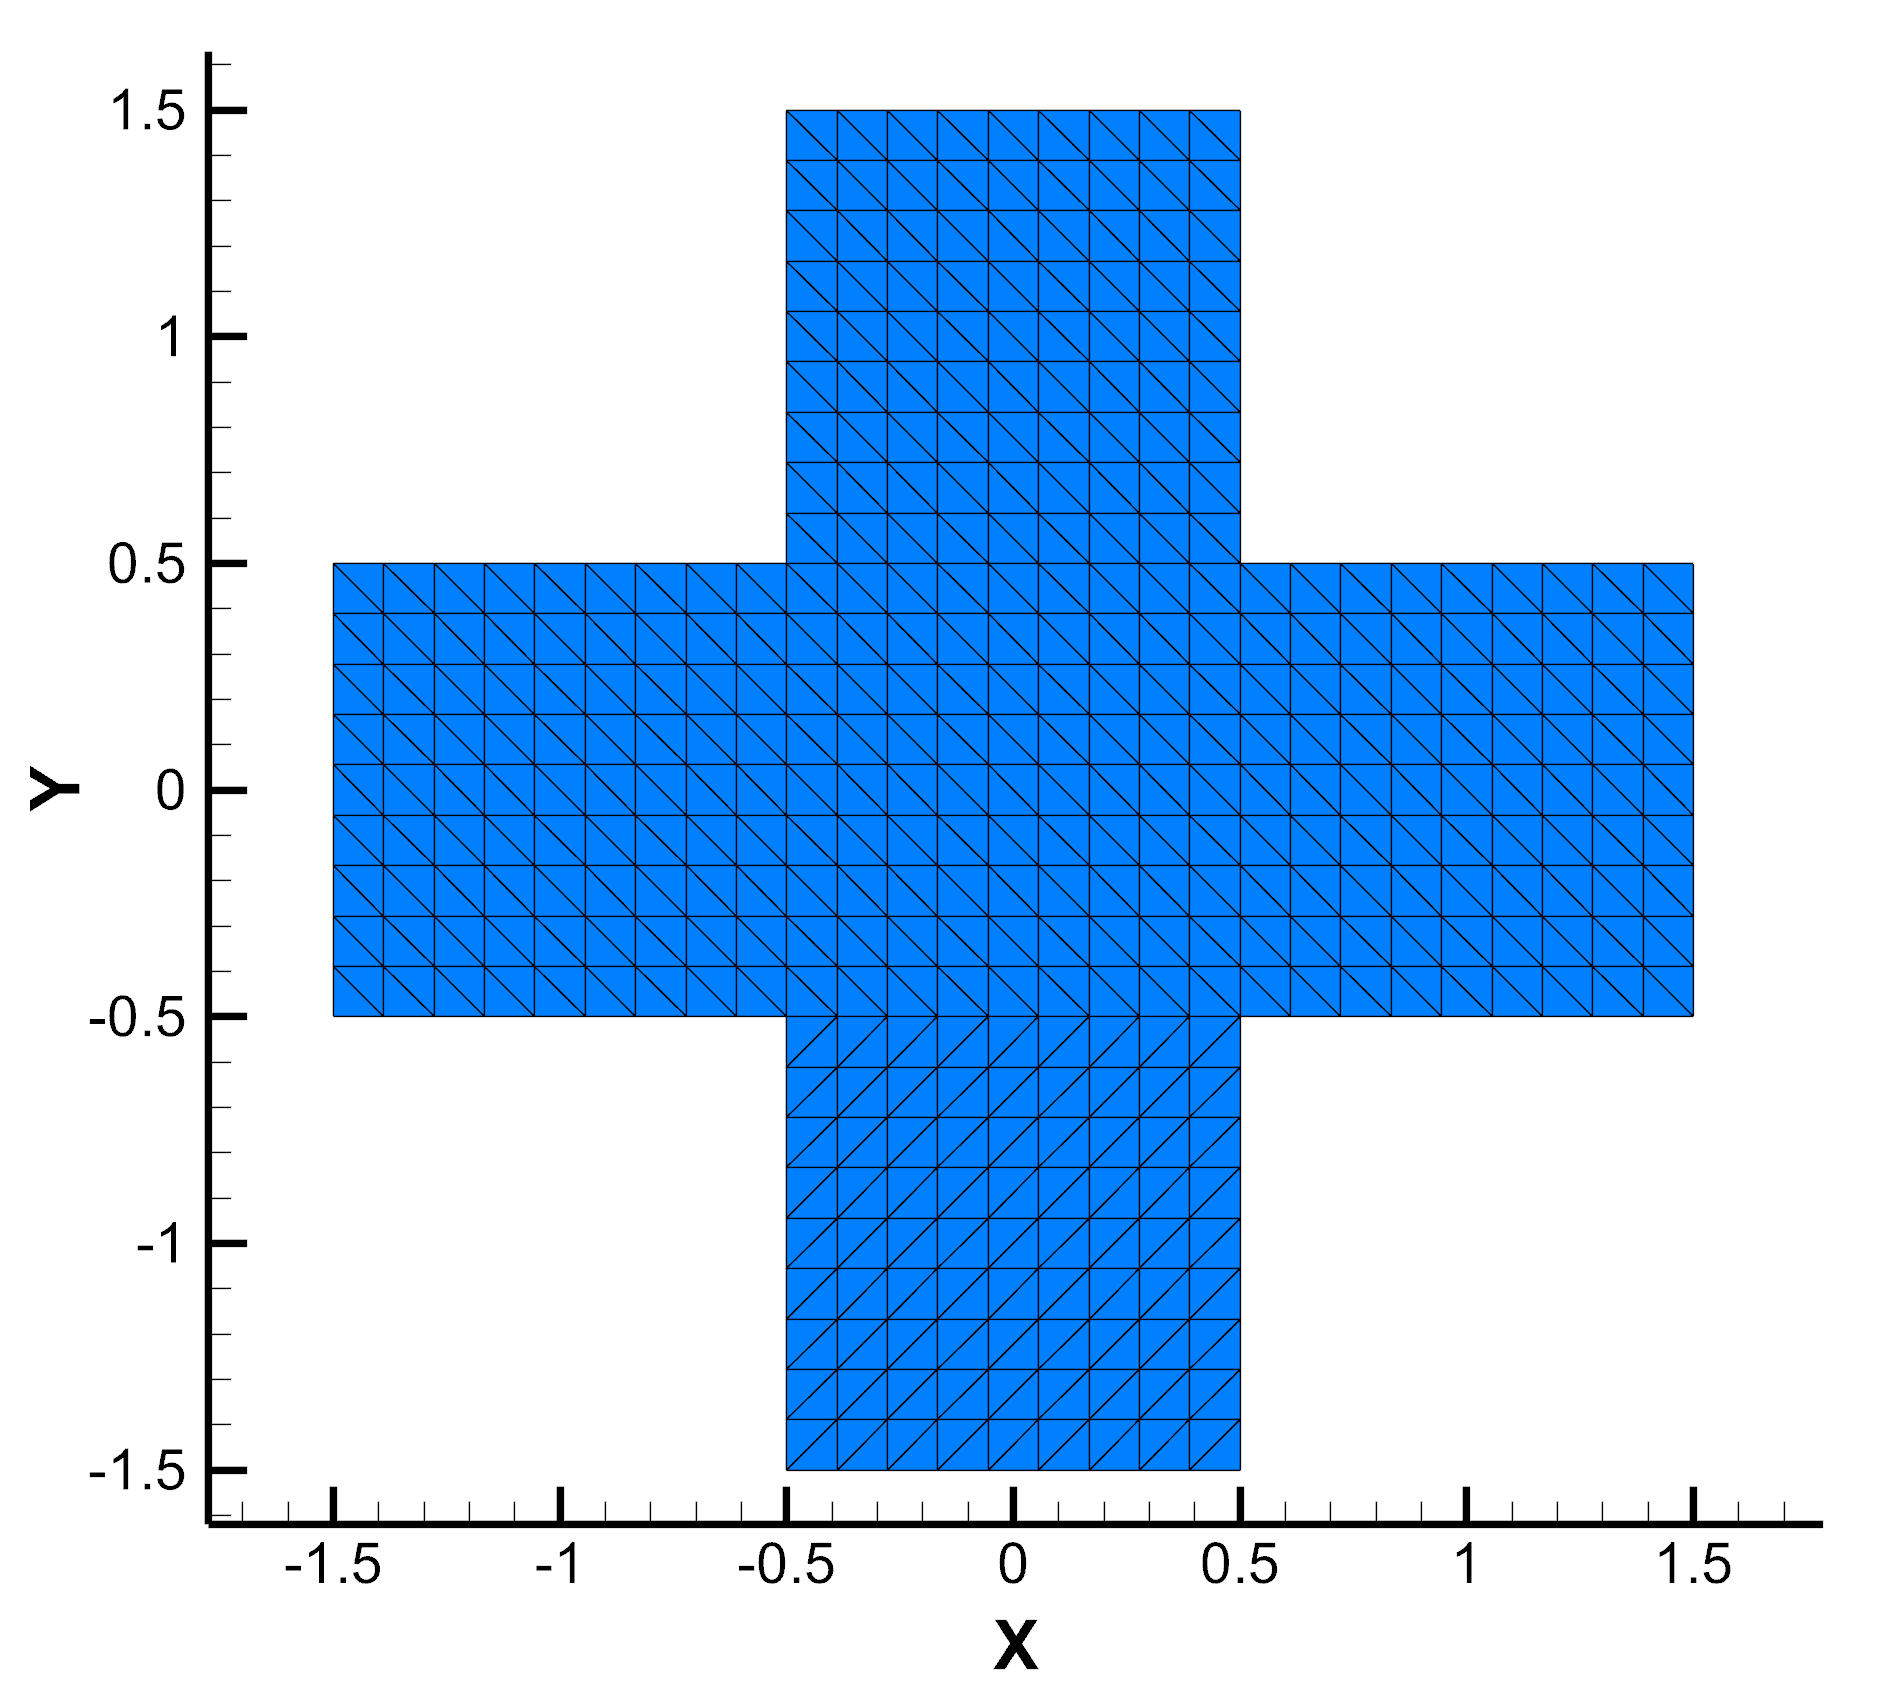
Figure 9
More information on triangulations can be found in the User’s Manual.